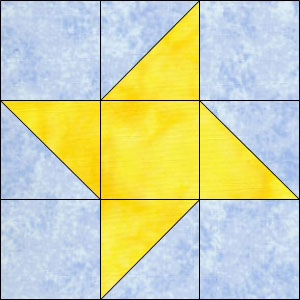
Friendship Star Mug Rugs for Symposium 2017
 We will start collecting Mug Rugs at the February meeting. Enter your name in the drawing for each Mug Rug you turn in. We have some lovely prizes that you could win.
How to Make a Mug Rug
Finished mug rug is 9”x 6”. These instructions are for piecing the top which consists of a 6 ½” Friendship Star Block and a 3 ½ x 6 ½” Side Block.
You need 2 fabrics for the Star Block: one for background and one for star.
| Cutting | |
| Background: | Cut 4 squares, 2 ½” on each side. Cut 2 squares, 2 7/8” on each side. Draw diagonal line on wrong side of each. |
| Star: | Cut 1 square, 2 ½” on each side. Cut 2 squares, 2 7/8” on each side. |
Piecing Star Block
Pair one 2 7/8” background square with one 2 7/8”star square, right sides together. Stitch ¼” seam on both sides of the diagonal line. Cut on diagonal line. Repeat for other pair of 2 7/8” squares. Finger press gently toward star fabric.
Lay out in 9-patch form shown below. Note alignment of the half square triangles. Stitch squares together in each row. Press seams toward outside for rows 1 and 3 and toward the inside for row 2. Stitch rows together. Size should be 6 ½ x 6 ½”.
Piecing Side Block
You can make the 3 ½ x 6 ½” Side Block using scrap strips or one piece of fabric. Vertical, horizontal and diagonal strips all look great. Attach the Side Block to one side of the Star Block to finish mug rug piecing. 2.5” square, background Half square triangle made from 2 7/8” squares. 2.5” square, star fabric.
After Piecing the Mug Rug
Option 1 – You can sew just the pieced top and turn it in. The Symposium Committee has a plan for large scale production to add the back, quilt and edge.
Option 2 – You can add batting and backing to your pieced top. Then you can quilt it and finish the edge by cutting with pinking shears or running a zig-zag or overcast stitch around the edges.

